前言
相信对当今开发人员来讲,CI(continuous intergration)已经不是一个陌生的名词了。作为把业务程序化的一线人员,对自己的开发过程进行程序化也是很理所应当的事情。在kubernetes、云原生等概念出现之前,比较流行的做法是使用jenkins来搭建CICD的流水线:代码仓库提交自动触发hook,触发jenkins自动编译与测试等原子化的任务,最后自动部署到SIT、UAT以及生产环境。

而等云原生时代到来后,CICD流水线也因应需求发生了改变,比如编译的制品变成了容器镜像,部署的目的地变成了kubernetes集群等。在这种情况下,天然集成到kubernetes的Tekton会是一个比Jenkins更加适合云原生体质的CICD工具。举个例子,在Tekton的设计中,一个pipeline由多个task组成,一个task是一个原子化、可复用的任务,比如说git-clone task,go build task等,而每个task里面又由不同的step组成,负责执行具体的步骤。Tekton在执行一次pipeline的时候,对于每个task,它都会生成一个pod来执行,而对于每个step,则会在pod中生成对应的容器来执行。如此一来,一个pipeline就天然使用了kubernetes提供的虚拟化能力,无需关心底层机器的环境与资源。
k8s安装Tekton
按照官方指引即可:
1
2
|
kubectl apply -f https://storage.googleapis.com/tekton-releases/operator/latest/release.yaml
kubectl apply -f https://raw.githubusercontent.com/tektoncd/operator/main/config/crs/kubernetes/config/all/operator_v1alpha1_config_cr.yaml
|
安装完后,我们便能在集群中使用pipeline, trigger, chain和dashboard了,这些都是tekton项目的组件。
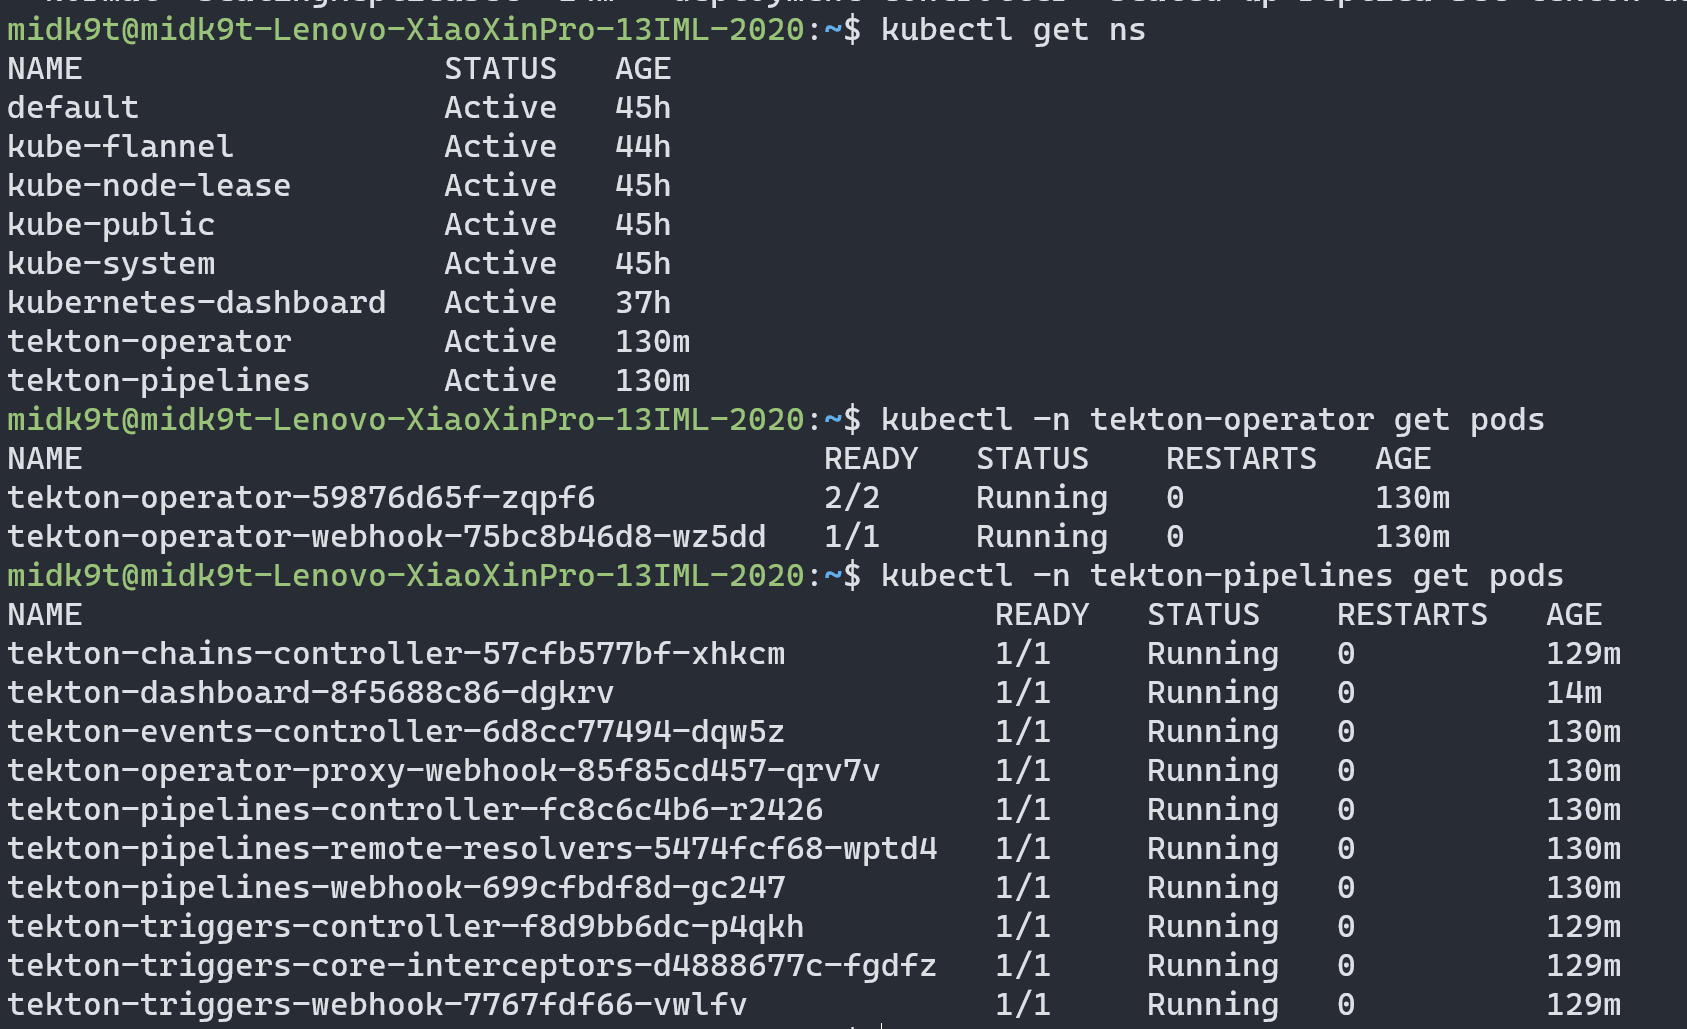
验证部署成功:
可以通过port-forward来访问tekton dashboard:
1
|
kubectl port-forward -n tekton-pipelines service/tekton-dashboard 9097:9097
|

tekton这mascot还挺可爱的,这是太空狸猫🤖😼?
Task
创建git-clone Task
上面提到了,tekton的流水线概念是pipeline,代表CI任务执行的模板,而pipeline又由一个个task组成,task是可复用的原子化任务,我们通过把不同task的输入输出进行串联,定义执行顺序以及运行条件,便搭建成一条持续集成的pipeline。
首先,我们先来尝试创建一个原子化的task,它负责从git url中拉取代码到本地,针对这个普遍的任务,tekton hub上面已经有现成的模板task,我们apply即可:
1
|
kubectl apply -f https://raw.githubusercontent.com/tektoncd/catalog/main/task/git-clone/0.9/git-clone.yaml
|
apply到集群后,我们便有了一个可复用的git-clone task,接下来使用taskrun来尝试运行一次这个task吧,taskrun是tekton中的一个CRD,代表一次task的执行,同理,tekton中还有pipelinerun,代表一次pipeline的执行。通过阅读git-clone task的文档,我们发现执行这个task有两个必填的参数:url和workspace,前者就是拉取代码所需的git仓库地址啦,而后者则需要进一步的解释:
什么是workspace
我们知道,一个task就是一个pod,而在pod与容器中使用持久存储的时候,需要在pod定义中声明PVC,然后在pod的container中定义使用哪些PVC,挂载到容器中的什么路径,比如说:
 1
 2
 3
 4
 5
 6
 7
 8
 9
10
11
12
13
14
15
|
apiVersion: v1
kind: Pod
metadata:
  name: example-pod
spec:
  containers:
    - name: example-container
      image: nginx
      volumeMounts:
        - name: example-volume
          mountPath: /data
  volumes:
    - name: example-volume
      persistentVolumeClaim:
        claimName: example-pvc
|
而由于在tekton中,一次task的执行是由一个pod来负责的,那么假如task需要使用持久化存储,比如把git clone task的代码拉取后持久化到本地,然后共享给下一个go build task,那么我们就需要给这个pod分配一个PVC。为了让pipeline更加可复用,可以随时迁移到其他集群环境运行,tekton就提出workspace这个概念,把PVC这个集群相关的信息从pipeline中移除,在pipeline里面,我们通过workspace来表示需要共享的持久化存储,然后在触发pipeline的地方,再声明分配什么PVC给workspace。
创建taskrun并执行
在配置好分配给workspace要使用的PVC后,我们便可以创建一次taskrun了。假设我们使用local的PV来承载workspace,存储在/data/k8s/pv1这个目录下,接下来,只需要配置taskrun的yaml:
 1
 2
 3
 4
 5
 6
 7
 8
 9
10
11
12
13
14
15
16
17
18
19
|
apiVersion: tekton.dev/v1
kind: TaskRun
metadata:
  name: git-clone-run-1
  namespace: default
spec:
  taskRef:
    name: git-clone
  podTemplate:
    # git-clone任务默认以65531用户id运行,而不是root,所以需要指定对应fsgroup,fsgroup 65532拥有所有volume的读取权限
    securityContext:
      fsGroup: 65532
  params:
    - name: url
      value: https://github.com/midknight24/frp.git # 在git上拉取fork过来的frp项目代码
  workspaces:
    - name: output
      persistentVolumeClaim:
        claimName: pvc1-5gi # 我们提前分配的pvc,背后绑定local pv在/data/k8s/pv1
|
创建后等待taskrun运行,如无意外,在dashboard上便能看到成功画面:

在宿主机/data/k8s/pv1路径,能看到拉取的代码:

Pipeline
多个原子化的task按照用户定义的顺序与条件串联起来,便形成一条CI流水线,在tekton中,pipeline这个CRD就是负责这一工作的。接下来我们沿着上面的例子,添加一个go-build task,然后把两个task通过pipeline串起来,做成一个简单的CI pipeline demo,这次我们手动编写这个task:
 1
 2
 3
 4
 5
 6
 7
 8
 9
10
11
12
13
14
15
16
17
18
19
20
21
22
23
24
25
26
27
28
29
30
31
32
33
34
35
36
37
38
39
40
|
apiVersion: tekton.dev/v1beta1
kind: Task
metadata:
  name: go-build
spec:
  description: >-
    go build task
  workspaces:
    - name: src
      description: |
        directory where source codes live
    - name: dest
      description: |
        directory where to put product binary
  params:
    - name: main-location
      type: string
    - name: prod-location
      type: string
    - name: bin-name
      type: string
    - name: version
      type: string
  results:
    - name: build-name
      description: name of the built binary
  steps:
    - name: build
      workingDir: $(workspaces.src.path)
      image: golang:latest
      script: |
        #!/bin/bash
        set -e
        cd "$(params.main-location)"
        VER=`echo "$(params.version)" | cut -c 1-5`
        BIN="$(params.bin-name)"-"$VER"
        go env -w GOFLAGS="-buildvcs=false"
        go build -o $BIN
        mkdir -p $(workspaces.dest.path)/"$(params.prod-location)"
        mv $BIN $(workspaces.dest.path)/"$(params.prod-location)"
|
这个task十分简单,就是在src workspace的main目录进行编译,制品后面使用commit hash的前5个字母作为版本号,然后移动至dest workspace中。接下来,我们来写一个pipeline,把git-clone跟go-build连接起来:
 1
 2
 3
 4
 5
 6
 7
 8
 9
10
11
12
13
14
15
16
17
18
19
20
21
22
23
24
25
26
27
28
29
30
31
32
33
34
35
36
37
38
39
40
|
apiVersion: tekton.dev/v1beta1
kind: Pipeline
metadata:
  name: clone-build
spec:
  # params代表整个pipeline的输入,用户可以把它们导向各个task的输入中
  params:
    - name: repo-url
      type: string
  workspaces:
    - name: shared-workspace
  tasks:
    - name: git-clone
      taskRef:
        name: git-clone
      workspaces:
        - name: output
          workspace: shared-workspace #把pipeline的workspace参数shared-workspace指向git-clone中的output
      params:
        - name: url
          value: $(params.repo-url)
    - name: go-build
      taskRef:
        name: go-build
      #把pipeline的workspace参数shared-workspace指向go-build中的src与output
      workspaces:
        - name: src
          workspace: shared-workspace
        - name: dest
          workspace: shared-workspace
      params:
        - name: main-location
          value: cmd/frpc
        - name: prod-location
          value: bin
        - name: bin-name
          value: frpc
        - name: version
          # 使用git-clone任务的commit结果作为version参数的值
          value: $(tasks.git-clone.results.commit)
|
结合yaml中的注释,应该不难理解pipeline是如何把task的输入和输出连接起来的,接下来我们创建一个pipelinerun来运行一遍pipeline:
 1
 2
 3
 4
 5
 6
 7
 8
 9
10
11
12
13
14
|
apiVersion: tekton.dev/v1beta1
kind: PipelineRun
metadata:
  name: go-pipelinerun-1
spec:
  pipelineRef:
    name: clone-build
  params:
    - name: repo-url
      value: https://github.com/midknight24/frp.git
  workspaces:
    - name: shared-workspace
      persistentVolumeClaim:
        claimName: pvc1-5gi
|

如无意外,pipeline执行成功,我们在workspace底层的宿主机的bin目录便能看到编译好的制品了:

EventListener & Trigger
到这里,我们已经成功搭建了一条简单的流水线。然而目前要启动这条流水线,需要通过手动编写pipelinerun文档的信息来把pipeline启动的信息输入进去并启动。这显然是不够自动化的,CI的理想画面是,开发人员把代码提交到仓库后,某种机制自动生成pipeline的参数,并启动流水线,开发人员只需要提交代码并等待即可。接下来介绍的tekton的Eventlistener和trigger,就是负责这一部分的实现。
这是相关的所有CRD及它们的关系图:

EventListener会作为一个k8s pod在某个端口上监听触发事件,当收到事件的时候,就会触发配置的所有TriggerTrigger 具体定义了EventListener触发时自动执行的一个任务,它由这些组件组成
TriggerBinding 负责从事件payload中提取数据,生成参数,传递给TriggerTemplateInterceptor在事件到来的最前端对原始的事件数据进行处理,Tekton Triggers组件自带许多常用的Interceptors可以直接使用,比如Github Interceptors可以直接用作拦截github的webhook请求TriggerTemplate声明了希望事件触发时执行的资源的模板,比如pipelinerun或者taskrun,在收到事件,经过Interceptor、TriggerBinding处理后,得到参数化的事件输入,生成对应的资源,比如说收到一次git push的webhook请求,执行一次clone-build流水线
下面我们为刚才的frp项目clone-build流水线添加一个Github EventListener,在push到dev分支的时候触发构建:
 1
 2
 3
 4
 5
 6
 7
 8
 9
10
11
12
13
14
15
16
17
18
19
20
21
22
23
24
25
26
27
28
29
30
31
32
|
apiVersion: triggers.tekton.dev/v1beta1
kind: EventListener
metadata:
  name: github-listener
spec:
  serviceAccountName: tekton-triggers-example-sa
  triggers:
    - name: github-trigger
      interceptors:
        - ref:
            name: "github" #官方提供的github拦截器
            kind: ClusterInterceptor
            apiVersion: triggers.tekton.dev
          params: #提供secret给listener证明webhook的合法性
            - name: "secretRef"
              value:
                secretName: github-secret
                secretKey: secretToken
              # 处理push事件
            - name: "eventTypes"
              value: ["push"]
        - ref:
            name: "cel" #官方提供的cel拦截器
            kind: ClusterInterceptor
            apiVersion: triggers.tekton.dev
          params:
            - name: "filter" #只处理dev分支,其余过滤掉
              value: "body.ref.startsWith('refs/heads/dev')"
      bindings:
        - ref: github-binding #使用github-binding作为参数绑定器
      template:
        ref: github-template #使用github-template作为执行模板
|
使用的拦截器需要的参数和用法,目前没有找到正式的文档,需要看看源码和案例来编写= =
然后我们看看github-binding,body中的变量可以在github官网上查到
 1
 2
 3
 4
 5
 6
 7
 8
 9
10
|
apiVersion: triggers.tekton.dev/v1beta1
kind: TriggerBinding
metadata:
  name: github-binding
spec:
  params:
    - name: commit #提取after作为commit hash参数
      value: $(body.after)
    - name: git-repo #提取clone_url作为git-repo参数
      value: $(body.repository.clone_url)
|
还有github-template:
 1
 2
 3
 4
 5
 6
 7
 8
 9
10
11
12
13
14
15
16
17
18
19
20
21
22
23
|
apiVersion: triggers.tekton.dev/v1beta1
kind: TriggerTemplate
metadata:
  name: github-template
spec:
  params:
    - name: commit
    - name: git-repo
  resourcetemplates: #可以触发多个资源的执行
    - kind: PipelineRun
      apiVersion: tekton.dev/v1beta1
      metadata:
        generateName: frp-clone-build-
      spec:
        pipelineRef:
          name: clone-build
        params:
        - name: repo-url
          value: $(tt.params.git-repo) #这样来把TriggerTemplate参数中的git-repo传
        workspaces:
        - name: shared-workspace
          persistentVolumeClaim:
            claimName: pvc1-5gi
|
把这三个CRD apply到k8s中,我们就差不多完成EventListener的搭建了,one more thing——还需要在github中配置webhook,也就是push事件时调用的k8s url,以及使用的secret,还需要把这个secret apply到k8s中,并在上面使用的service account中绑定这个secret,github方面的操作就不展开了,这里记录一下配置secret和service account:
 1
 2
 3
 4
 5
 6
 7
 8
 9
10
11
12
13
|
apiVersion: v1
kind: Secret
metadata:
  name: github-secret
data:
  secretToken: "dGhpcyBpcyBzZWNyZXQ=" # echo -n "this is secret" | base64
---
apiVersion: v1
kind: ServiceAccount
metadata:
  name: tekton-triggers-example-sa
secrets:
  - name: github-secret
|
对了,还需要把event listener生成的service暴露到公网,让github能否访问,我这里简单使用了一个在用的VPS,搭建frp server,然后集群内宿主机使用frp client连接,最后用kubectl port-forward把frp client local port与service内的port连通。
最后尝试在frp fork项目下提交一次dev分支的commit,如无意外的话,就能成功触发流水线了:

总结
到了这一步,一条全自动的简易CI流水线就搭建完成:我们只需要把代码提交到github的dev分支,k8s中的tekton就能监听到push事件的发生,并触发代码拉取与编译的工作,最后用commit hash的前五个字符作为版本号,在指定的路径生成代码制品,开发人员可以很方便的拿取并进行测试。当然,这只是CI/CD工作流的前半部分的简单版本,实际上在流水线中间还可以加入代码扫描,单元测试等Task,把更多的开发相关的工作加入进去,更大程度地减少重复工作,提升开发效率。